This hat is from the later Norse period. It bears a strong resemblance to a Santa Claus hat, so I try to stay away from red and white when I make these.
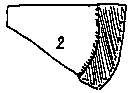
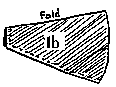
The basic pattern is a cone, with the diameter of the opening slightly larger than the head size. Figure 1a shows how to start. I usually make a sample pattern and use trial and error to get a correct fit. Remember that you will need to leave a little extra space to allow for lining and underlining, as well as the fur headband. The best way to do this is to cut the lining to fit and sew it up (fig. 1b). Then cut the underlining and outer fabric to fit over this. Use wool, felt or flannel for the lining. It doesn't slip around on your head as much.
I use quilt batting for an underlining. I find the hat drapes better and looks more substantial with it. Cut the underlining slightly larger than the lining. Now fit the outer fabric. You can use a brocade (from Byzantium, of course), a very short pile fur (to resemble seal) or a wool. The fancier the occasion, the fancier the fabric.
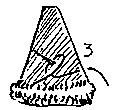
For the headband cut a strip of good quality fake fur about 6" wide and as long needed to go around the head. Sew the ends of the strip together and fit the strip to the hat, sewing through all three layers and ease to fit (fig. 1). Next, fold the fur strip in half, lengthwise and stitch the free edge to the inside of the cap (fig. 3).
Have the owner try the hat on and arrange the point as shown in the illustration (fig. 4). I usually tack the point in place to the side of the cap with a couple of stitches.
Now you can decorate the point. Some depictions show one to three filigree "balls" attached. Others show a tassel. The decorations are usually metallic, so gold or silver cord should be used for tassels if you want them. Large silver or brass filigree beads are very effective.